If you’re a fan of Final Fantasy (like me) you will love these. And they’re chocolate filled of course cause they’re CHOCObos!
And if you’re not a fan, you can still make these cause they’re cute and kind of look like chicks.
The tangzhong in this dough makes these super soft and pillowy, and last longer, by the way!
(Oh and my favourite final fantasy game is 9)
Makes: around 9 (depends on the size, I like to switch it up and make various sizes)
TANGZHONG PASTE
100ml water
25g strong white flour
DOUGH
125ml whole milk (or any plant-based milk)
30g unsalted butter (or vegan butter - use one that's close to 80% fat content)
10g caster or granulated sugar
1 tsp salt
7g instant fast-action dried yeast
I large egg (or replace with 30ml vegetable oil and 30ml plant-based milk)
350g strong white flour, plus extra for dusting yellow and orange gel food dyes
PLUS
Some squares of milk or dark chocolate.
sunflower or other neutral-tasting oil, for oiling
1 egg, to brush on top before baking (or use 4 parts plant-based milk to 1 part golden syrup, or any other liquid sugar, such as maple syrup)
TO DECORATE
edible black ink pen, or black food dye mixed with a small amount of water
METHOD
1 / First, make the tangzhong paste. Using a balloon whisk, mix the water and flour together in a pan until smooth.
Place the pan over a medium heat and stir constantly with a spatula until thickened to a pudding-like consistency. Pour into a bowl, cover with plastic wrap (making sure it touches the surface of the tangzhong) and chill in the freezer for 10 minutes.
2 / Meanwhile, for the dough, gently warm up the milk in the microwave - it should be warm but not hot. Melt the butter in the microwave. Lightly oil a large bowl.
3 / Place the milk and butter in another large bowl and add the sugar and salt. Add the chilled tangzhong along with the egg (or oil and milk mixture) and whisk together with a balloon whisk. Add yellow food dye at this point - you need quite a bit!
4 / Add the flour and yeast to the mixture. If using a stand mixer, just allow the machine to knead for 10 minutes with the dough hook attachment.
If working by hand, use a spoon to combine everything into a shaggy ball of dough, then turn out onto a floured work surface and knead by hand for about 10-15 minutes. The dough will be sticky to start with, but avoid adding too much flour - it will
gradually become less sticky as you knead it. If the dough sticks to the surface, use a dough scraper to scrape it off.
Keep kneading until the dough is smooth; it will still be a little tacky but this is normal. If the dough isn’t bright yellow enough at this stage, add more and knead in thoroughly.
5 / Place the dough in an oiled large bowl and cover with plastic wrap. Leave to rise at room temperature until about doubled in size. This takes about 1 hour, but can vary significantly depending on the ambient temperature of where you leave it.
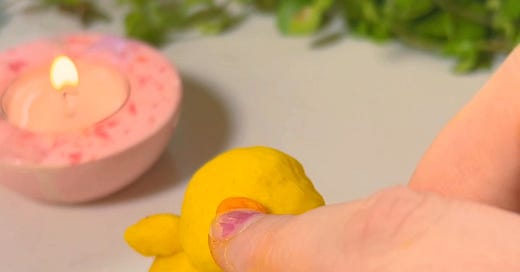
6 / When the dough has doubled in size, turn it out onto a lightly floured work surface and knock back. Pinch a teaspoon sized piece of dough, and knead in orange food dye to colour. Set aside. Pinch off two pieces of dough - one larger one for the body, and a smaller one for the head (see video for the visual reference for all these shaping steps). Then pinch two small pieces for the little wings.
Shape by smoothing and flattening the larger ball of dough, then adding chocolate pieces to the centre. Stretch the edges up and press together (trying to get it taut so that the surface is smooth). Roll around to get it as smooth as you can. Shape the head in a similar way, just without the chocolate. Piece together the Chocobo head, body and arms like in the video. Add an orange piece for the beak, like in the video. Repeat to make all the Chocobo! You can make them different sizes too (you’ll just need to remove the smaller ones from the oven earlier)
7 / place on a lined baking tray, leaving enough gaps in between for rising.
Little tip: you need to make sure all the body pieces are joined securely, if they’re not they may just fall off while the bread is rising/baking. You can use a very tiny amount of water to help it stick, but I also like to use my fingers to really squeeze everything together.
8 / cover with lightly oiled plastic wrap and leave to prove until nearly doubled in size. The dough should spring back halfway when lightly indented with a finger. Fifteen minutes before the end of the rise, preheat the oven to 180°C
[350°F/Gas mark 4].
9 / Whisk the egg (or the plant-based milk mixed with golden syrup) in a small bowl, then brush this on top of the dough and bake for 15-20 minutes, or until risen and lightly golden brown. The smaller chocobos will be ready in 10-15 mins though. Only the largest jumbo ones need 20 mins!
10 / you will probably find that some of your Chocobo have grown lopsided! There’s a lot of cuteness in some of this character, but if it’s really not working for you, make a little icing (just whisk a tiny bit of water and icing sugar together) and use to reposition the head or arms. Or just eat it and present the rest.
11/ finish by painting (food dye plus the tiniest amount of water) or drawing (edible ink pen) on lines for the eyes.
Enjoy your Chocobos!!!


Share this post